
Wix Answers Help Center
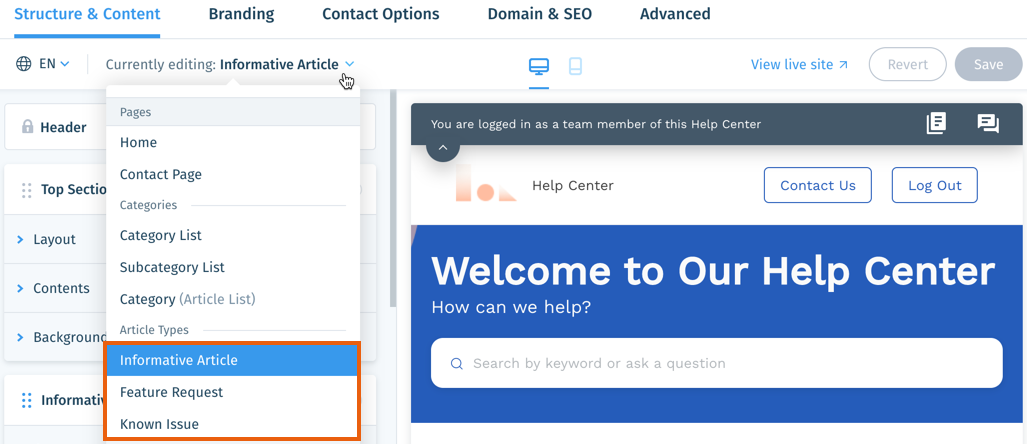
Customizing Your Help Center Article Types
Customize the structure and content of each article type to fit your help center's needs. For each article type, you can edit the top section and add a Categories List and Selected Articles section.
Note:
- We're currently working on releasing new help center settings. If the steps in this article do not match your help center settings, click here for directions.
- You can add up to 10 total sections, including the default sections, to each article type.
Learn more about:
Learn how to add and edit the following sections in your article types:
- The Selected Articles section for displaying specific articles on the page.
- The Category List section for displaying a list of your categories and subcategories.
- The Custom Section built from your own HTML or CSS code.
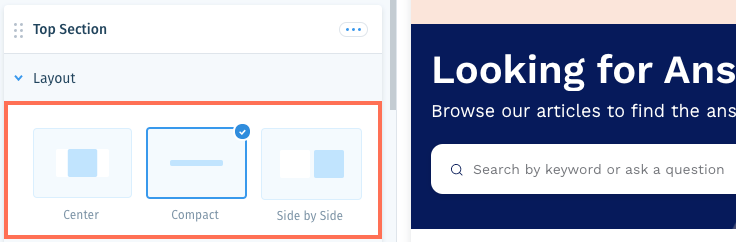
Editing the top section of your article types
Customize the layout, contents, and background of the top section for each of your article types.

Show me how

 and select the language you'd like to customize.
 icon next to Top Section and select Remove.
Editing the Informative Article type
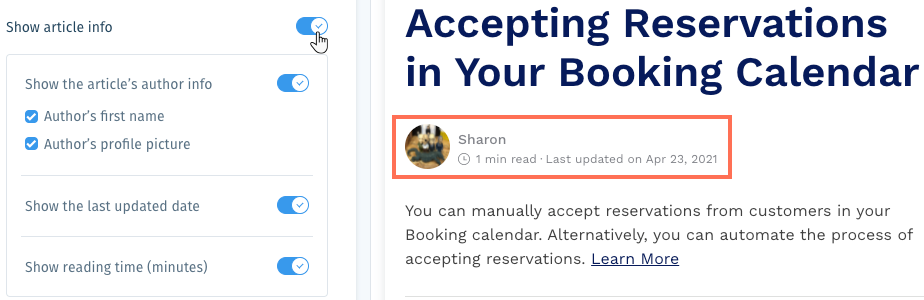
Customize the structure and content the article type used most in your help center - Informative articles. You can allow articles to be voted helpful or unhelpful, provide contact options after unhelpful votes, design the Related Articles section, and more.

Show me how
 to show a navigation menu to the left of every article type in your help center (including Feature Requests and Known Issues). The menu displays other articles from the same category or subcategory as the article you're viewing.
Editing the Feature Request Article type
Customize the structure and content of the Feature Request article type. These articles help you gauge interest in features you don't have and inform customers when you develop them. You can let viewers click to vote for features and become followers, show a Related Articles section, and more.

Show me how


Editing the Known Issue Article type
Customize the structure and content of the Known Issue article type. These articles help you collect complaints about issues you're aware of and inform customers when they're fixed. You can let viewers click to report when they're experiencing issues, edit the thank you message, display Related Articles, and more.

Show me how


To customize additional text in your help center, such as the search bar placeholder:
- Click the Advanced tab at the top.
- Click the Show More icon
 next to the relevant language and select Customize Text.
 - Translate each Text field.
Note: Use the Search field to locate specific text strings or keys.
 - Click Save.
- Repeat these steps for each language.
Note:
To undo changes that you have not saved, click Revert at the top right.
Was this article helpful?