
Wix Answers Help Center
Setting Up the Wix Answers Contact Form in Your Widget
Allow customers to submit tickets through your Widget with the customizable Wix Answers Contact Form. Add custom fields to the form to gain valuable information about your customers and the issues they're experiencing.
The more you know about your customers, the better your replies will be!
The more you know about your customers, the better your replies will be!
Tip:
Use Automatic Actions to prioritize and organize tickets based on the custom fields you add to your form.
To set up the Wix Answers Contact Form in your widget:
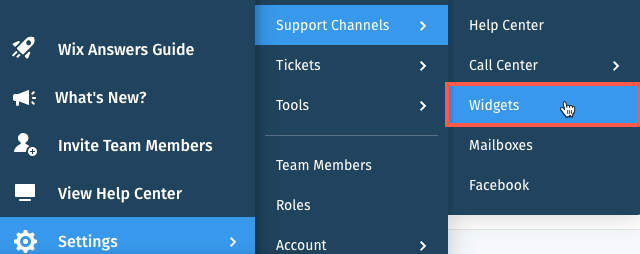
- In the Wix Answers app, go to Settings > Support Channels > Widgets.
- (If you have multiple widgets) Click the widget name and select the relevant widget.
- Click Contact Form under Messaging Module.
Note: Make sure the Messaging Module toggle is enabled.

- Customize the text that appears in your contact form:
- Page Title: Add a title for the contact form.
- Subtitle: Add a subtitle that appears under the title.
- Response Message to Users: Enter a message to give customers an estimate of your response time.
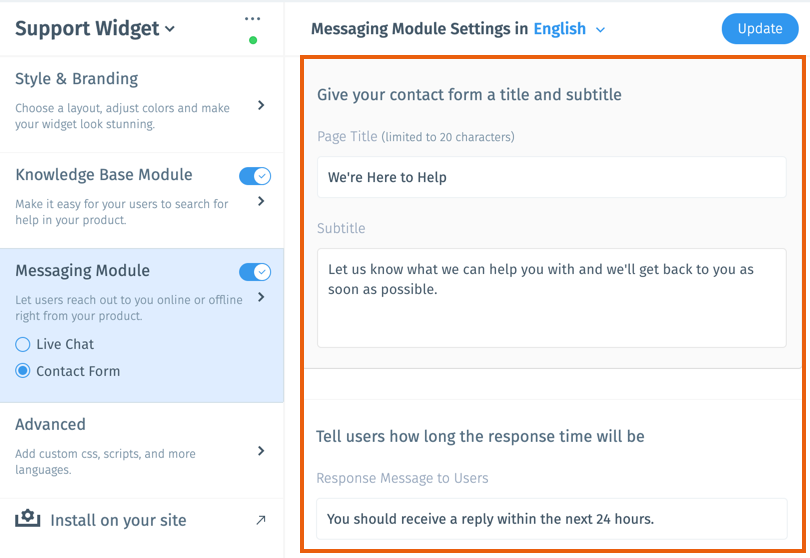
- Select Submit tickets via the Wix Answers Contact Form.
- (Optional) Click Add Field to add fields to your Contact Form:
- Add an existing custom field:
Note: To add a field that hasn't been translated yet, click Activate next to the field under Fields not active in [Language], then translate the field and click Update.- Select the field under Active Fields in [Language].
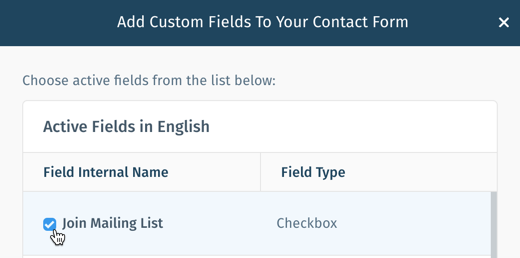
- Click Add Selected Fields.
- Select the field under Active Fields in [Language].
- Create a new custom field:
- Click Create new field.
- Select a field type and fill out the details:
- Text: Add a text field for customers to type short responses.
- Dropdown: Add a drop-down options for customers to select.
- Multi-line: Add a multi-line text field for customers to enter detailed responses.
- Checkbox: Add a checkbox for customers to click to confirm a selection.
- Number: Add a number field for customers to type a numerical response.
- Click Create.
- Add an existing custom field:
- Click Update.
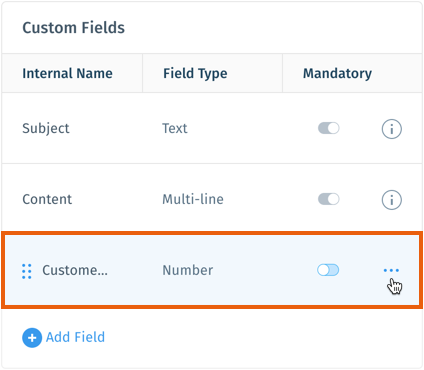
Hover over your custom fields for additional options:
- Click and drag the Reorder icon
 to adjust the order in which your fields appear.
 - Click the Toggle icon to make the field mandatory.
- Click the Show More icon
 to edit or remove the field.
Was this article helpful?