
Wix Answers Help Center
Setting Up Your IVR Flows
Make a great first impression with callers by customizing their first point of contact with your company - your Interactive Voice Response (IVR) flow. With IVR flows, you determine the paths callers can take to be routed to appropriate queues, phone numbers, or voicemails. Add text to speech or recorded audio messages to your flows to personalize the directions your callers hear.
To create a new IVR flow:
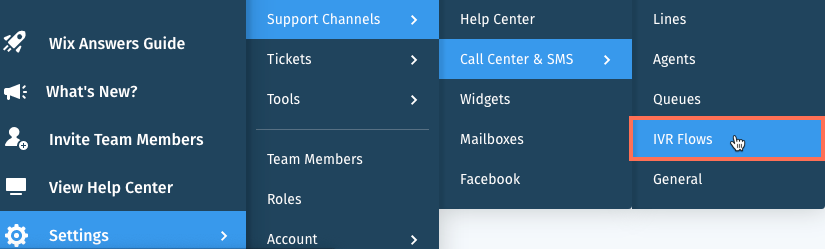
- In the Wix Answers app, go to Settings > Support Channels > Call Center & SMS > IVR Flows.
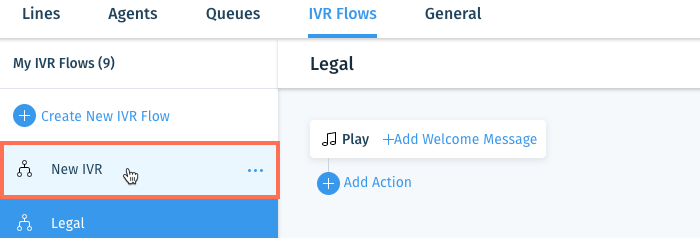
- Click + Create New IVR Flow.

- Enter a name for the new IVR flow and click Create.
- Select the IVR flow you just created from the top of the My IVR Flows list.
- Click + Add Welcome Message.
- Select a message type:
- Text to speech: Convert your written message into spoken words.
- Select a language from the Message language drop-down.
Note: Some supported languages are not available for text to speech. - Enter the message callers will hear in the Message text field.
- Click Save.
- Select a language from the Message language drop-down.
- Recorded sound file: Play a recorded audio message.
- Click Upload an audio file.
- Select a file from your computer and click Open.
Note: You can upload .WAV, .MP3, and .WMP file types. - Click Save.
- Text to speech: Convert your written message into spoken words.
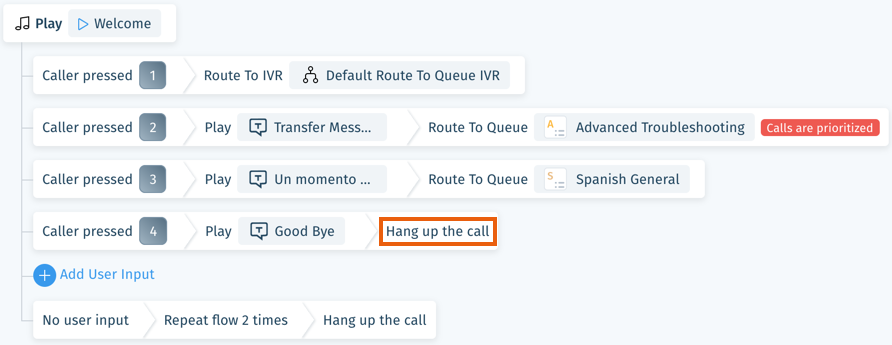
Tip:
Use your welcome message to inform callers about the next options in your IVR. For example, if Digit Input is the next action, explain which numbers callers should press to be routed appropriately.
- (Optional) Click + Add Another Message to add a message that will play after the first message.
Note: Click the Reorder icon and drag a message up or down to reorder your messages.
 - Click Add Action.

- Select the action that occurs next:
Route Call

Hang Up
Digit Input

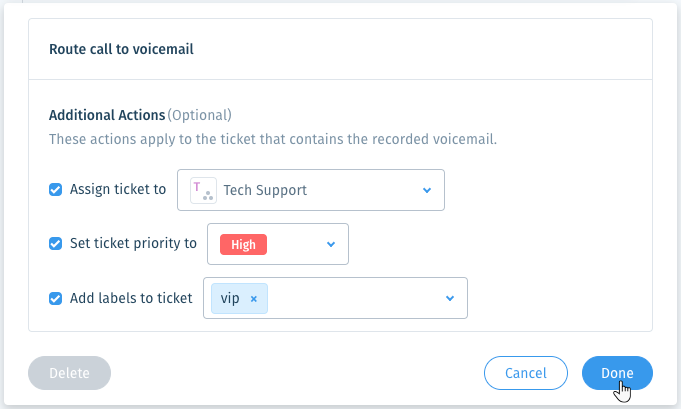
Route to Voicemail
Number Input
Send Caller Info to CRM
10. Click Save at the top-right.
Was this article helpful?