
Wix Answers Help Center
Adding the "Assigned to/by" Filter to Views
Add the "Assigned to/by" filter to show only tickets assigned to specific agents or groups, assigned from specific agents, or unassigned tickets.
To add the "Assigned to/by" filter:
- Click the One Inbox icon
 in the side panel on the left.
 - (Optional) Click the Language icon
 and select a language to show its Views and tickets.

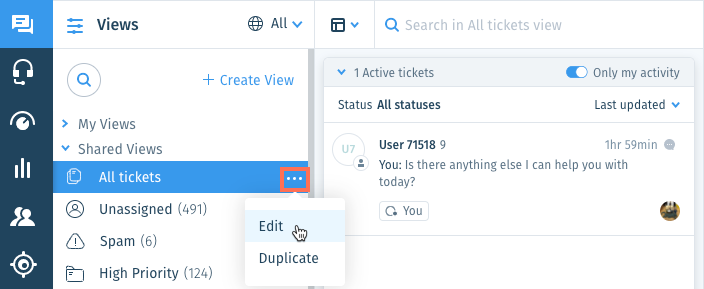
- Select the View you'd like to edit from the Views panel on the left.
Note:
In the My Tickets, Taken by Me, and My Snoozed Tickets Views, you can filter the ticket lists by status, but you cannot add other filters.
- Click the Show More icon
 next to the View name and select Edit.
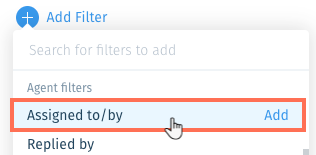
- Click + Add Filter from the Views panel on the left.
- Scroll down and select Assigned to/by under Agent filters.
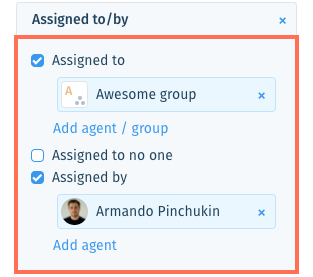
- Select the relevant option(s):
- Assigned to: View tickets assigned to specific agents or groups.
- Click Add agent / group.
- Enter the name of an agent or group and select them from the list.
- Repeat these steps to add more agents or groups to the filter.
- Assigned to no one: View tickets that are currently unassigned.
- Assigned by: View tickets assigned by specific agents.
- Click Add agent.
- Enter the name of the agent and select them from the list.
- Repeat these steps to add more agents to the filter.
- Assigned to: View tickets assigned to specific agents or groups.
- (Optional) Save the View for other team members to use.
Note:
To save Views, you must be an administrator or have a custom role with Create, update, and delete views enabled in the Ticket List & Saved Replies permissions.
Was this article helpful?