
Wix Answers Help Center
Filtering Your Ticket Lists by Ticket Status
Show only tickets in the specific statuses you choose by filtering your ticket lists by status.
Changes you make to the Status filter save to your personal profile. They apply to all other Views you select except for Views that have Add Status Filter to View toggled on. You can save Views with this toggle enabled if you want other team members to see the Status filters you applied when they access the View.
Tip:
Add other filters to Views to modify the types of tickets displayed in their ticket lists.
To filter your ticket lists by status:
- Click the One Inbox icon
 in the side panel on the left.
 - (Optional) Click the Language icon
 and select a language to show its Views and tickets.

- Select the View you'd like to filter from the Views panel on the left.
Note:
In the My Tickets, Taken by Me, and My Snoozed Tickets Views, you can filter the ticket lists by status, but you cannot add other filters.
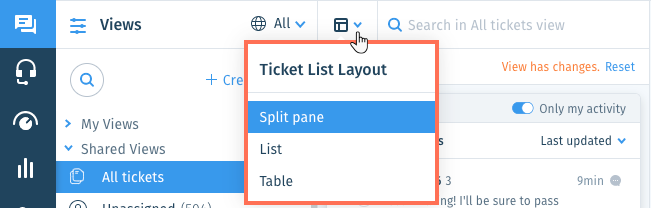
- (Optional) Select a Layout from the Ticket List Layout drop-down at the top:
- Split pane: Display ticket previews in Active and Inactive ticket lists on the left. Selecting a ticket displays it in the ticket panel on the right. Learn more about active vs. inactive tickets.
- List: Display ticket previews in a list layout where clicking a ticket opens it in a new tab.
- Table: Display ticket previews in a table layout where you choose which columns display by clicking Edit Columns at the top-right.
- Click the Status drop-down on the relevant ticket list.

Note:
The Active tickets list in the Split Pane layout displays tickets in all statuses only. You can add the Status filter to Views to display active tickets in different statuses.
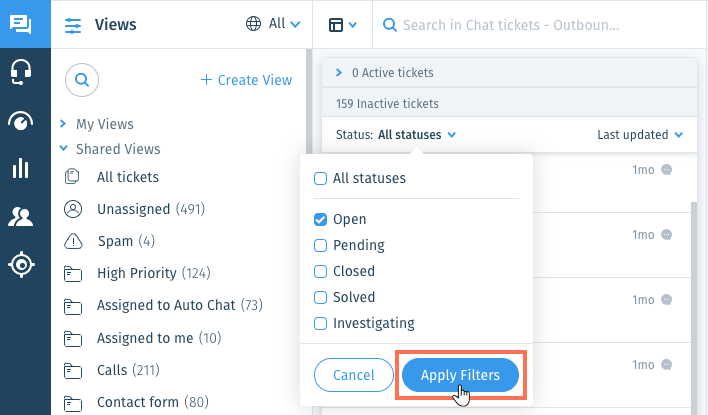
- Select the status(es) of the tickets you want to show in the ticket list:
- All statuses: Show tickets in all statuses.
- Open: The default status of new tickets and tickets that customers have sent messages on but haven't received replies yet.
- Pending: Tickets that team members have replied to that haven't been closed yet.
- Closed: Tickets that have been completed but not marked as solved by team members or automated processes.
- Solved: Tickets that have been resolved by team members or automated processes.
- Investigating: Tickets awaiting resolution that need further investigation.
- Click Apply Filters.
- (Optional) Save the View for other team members to use.
Show me how
 next to the selected View and click Edit.
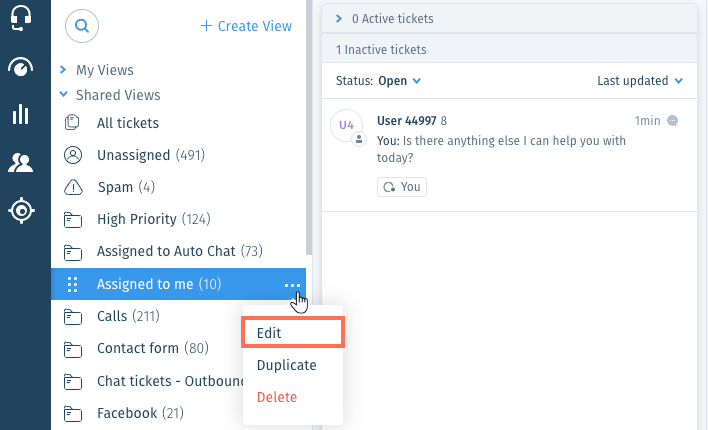
 if you'd like to save your status filter selection to the View.

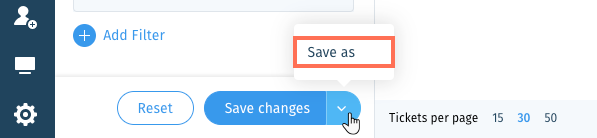
 to make it a private View that can only be accessed by you.
Additional actions: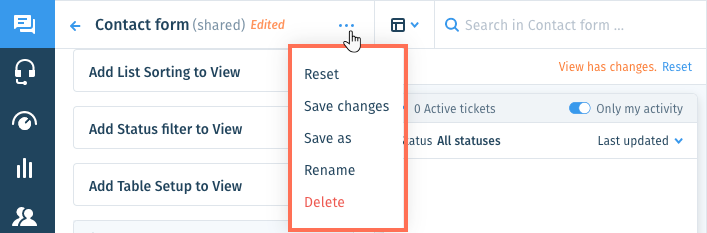
Click the Show More icon  at the top of the Views panel and select:
at the top of the Views panel and select:- Reset: (If you've edited the View but haven't saved changes) Revert the View to its last saved version.
- Rename: Change the name of the View. This option is available for custom Views only, not default Views.
- Delete: Permanently remove the View for all team members. This option is available for custom Views only, not default Views.
Was this article helpful?