
Wix Answers Help Center
Adding a Contact Widget to Your Help Center
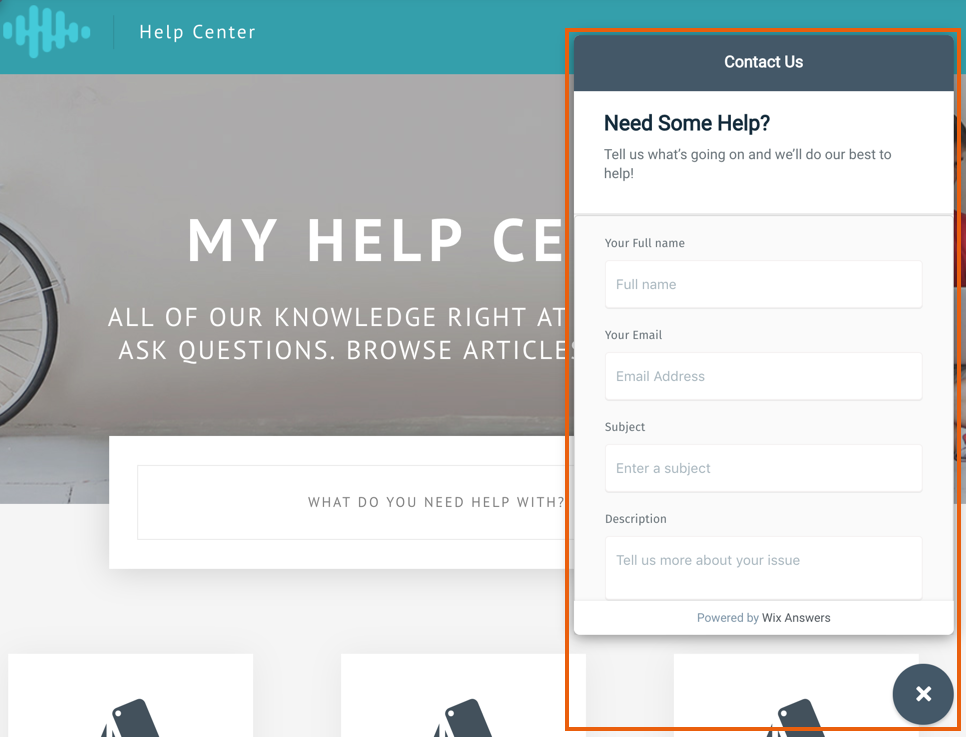
Allow customers to contact you via contact form or Live Chat directly from a widget displayed on your Help Center.
Tip:
Since customers already view your Knowledge Base articles from your Help Center, we recommend disabling the Knowledge Base Module from the widget you're placing in your Help Center.
Note:
Currently, adding more than one widget per page on your Help Center is not supported.
Adding a Widget to Your Help Center
Install a widget on your Help Center for your primary supported language.
To add a widget to your Help Center:
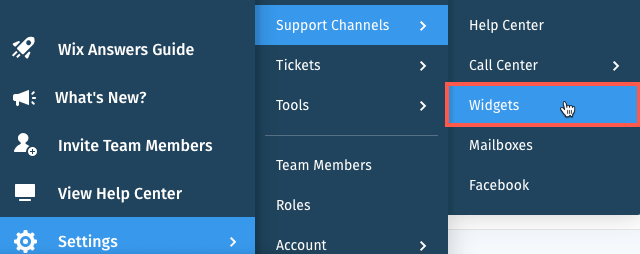
- In the Wix Answers app, go to Settings > Support Channels > Widgets.

- (If you have more than one widget) Click the widget name and select the relevant widget.
- (If enabled) Click the toggle
 next to Knowledge Base Module to disable it.
Note: You may need to change which module will open by default in the Advanced section first.
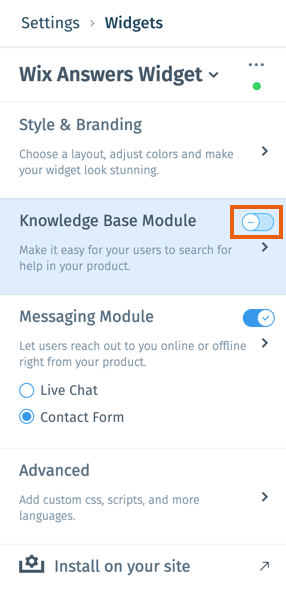
- Select how customers will contact you through the widget:
- Live Chat: Customers can chat in real-time with your chat support agents. Learn more about setting up Live Chat.
- Contact Form: Customers can submit a ticket through a customizable form. Learn more about setting up your contact form.
- Click Install on your site.
- Click Copy to clipboard to copy the code.
- Click Done.
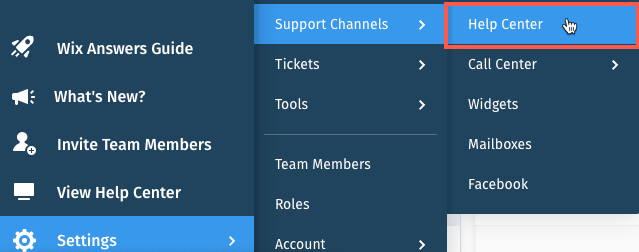
- In the Wix Answers app, go to Settings > Support Channels > Help Center.
- Click the Advanced tab.
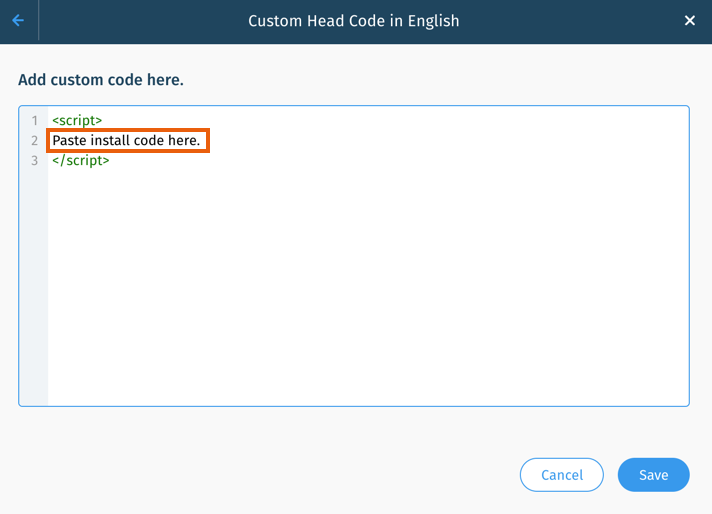
- Scroll down and click Edit next to Custom Head Code.
- (If necessary) Click the relevant language.
- Type <script> </script> in the Add custom code here field.
- Paste the widget code between the <script> </script> tags.
- Click Save.
Adding a Widget to Your Help Center in a Secondary Language
For multilingual help centers, you can install your contact widget for each supported language.
To add a secondary language widget:
- In the Wix Answers app, go to Settings > Support Channels > Widgets.
- (If you have more than one widget) Click the widget name and select the relevant widget.
- Click the Advanced section.
- Make sure each language you'd like to install is toggled on under Supported Languages.
- Click Install on your site.
- Click Copy to clipboard to copy the code.
- Click Done.
- Hover over Settings
 and click Help Center.
 - Click the Advanced tab.
- Scroll down and click Edit next to Custom Head Code.
- Click the relevant language.
- Type <script> </script> in the Add custom code here field.
- Paste the widget code between the <script> </script> tags.
- Locate 'en' in the code and change it to the abbreviation of the language you'd like your widget to display (e.g., change 'en' to 'es' to display your widget in Spanish).
Note: If your primary language is not English, edit the abbreviation for your primary language instead.

- Click Save.
- Click Done.
Country abbreviations:
Click here for a list of 2-letter locale code abbreviations for each language.
Was this article helpful?