
Wix Answers Help Center
Working With Spam Tickets
You can mark or unmark tickets as spam to exclude or include them from your ticket lists. If you want to include spam tickets or show only spam tickets within a View, you can edit the Spam filter included in each of your default shared Views.
To access the Spam View:
Click the One Inbox icon  in the side panel and select Spam under Shared Views.
in the side panel and select Spam under Shared Views.
Note:
Your default private Views (My Tickets, Taken by Me, and My Snoozed Tickets) include spam tickets.
Marking a Ticket as Spam
Mark irrelevant tickets as spam to remove them from ticket lists in your Views.

Show me how
 in the footer and select Mark as spam.
 Marking a Ticket as Not Spam
You can mark tickets as "not spam" to remove them from the Spam View.

Show me how
Editing the Spam Filter
The Spam filter is automatically included in each of your default shared Views. You can edit this filter if you want to include spam or only show tickets marked as spam in the View. Your default private Views (My Tickets, Taken by Me, and My Snoozed Tickets) include spam tickets.

Show me how
 and select a language to show its Views and tickets.
 next to the View name and select Edit.
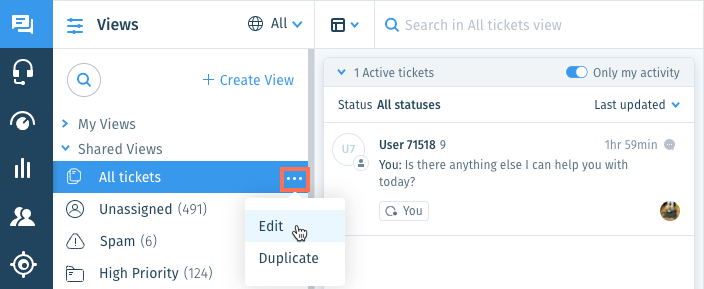
Was this article helpful?