
Wix Answers Help Center
Creating a New SLA Policy
Create a Service Level Agreement (SLA) policy to define target timeframes for responding or resolving tickets. Set the hours in which your SLA policy is active so that target timeframes aren't affected during downtime or vacations.
Once you've created an SLA policy, use Automatic Actions to apply it to relevant tickets.
Once you've created an SLA policy, use Automatic Actions to apply it to relevant tickets.
To create a new SLA policy:
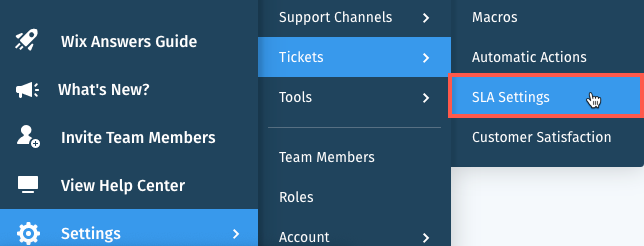
- In the Wix Answers app, go to Settings > Tickets > SLA Settings.
- Click + New SLA Policy.
- Enter a name for your policy under Policy Name.
- Select the target timeframe(s) under Targets:
- Respond within: Enter the days, hours, and minutes tickets should be responded to within.
- Resolve within: Enter the days, hours, and minutes tickets should be resolved within.

- Select the Active Hours (SLA Target Time Measured):
- Available 24/7: Your SLA target timeframes are continuously measured.
- Custom Hours of Operation: Set the hours in which your target timeframes are measured.
Note: Click the Show More icon and select Apply to all days to set the same active hours for each day of the week.
- Click Create Policy.
Next: Click Apply Policy to set up an Automatic Action for applying your SLA policy to incoming tickets.
Tip:
Create multiple SLA policies and apply them to different scenarios. For example, create a "VIP" SLA policy that applies to tickets with a "VIP" label. Learn more about using Automatic Actions to apply labels to tickets.
Managing your SLA policies:
Activate, deactivate, sort, edit, duplicate, or delete SLA policies from your SLA Settings. Learn More
Was this article helpful?