
Wix Answers Help Center
About Service Level Agreement (SLA) Policies
Use Service Level Agreement (SLA) policies to set standards for your support team to meet. When you create an SLA policy, you define the target timeframes for responding or resolving tickets. Next, create an Automatic Action that applies the policy to tickets that meet conditions you define.
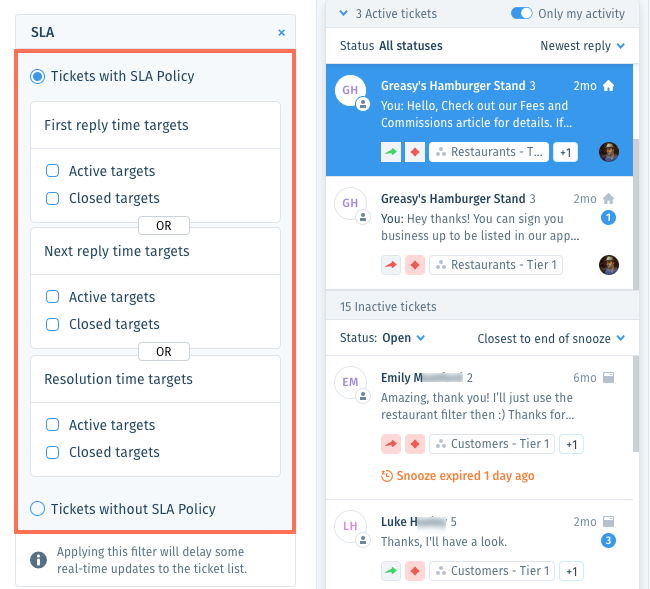
Agents can view the amount of time remaining before an SLA policy goal is missed directly on tickets. Add the SLA filter to your Tickets List to display tickets that have met, missed, or are close to missing their SLA goals.
Agents can view the amount of time remaining before an SLA policy goal is missed directly on tickets. Add the SLA filter to your Tickets List to display tickets that have met, missed, or are close to missing their SLA goals.
Creating an SLA Policy
Create an SLA policy to define target timeframes for responding or resolving tickets. Set the hours in which your SLA policy is active so that your target timeframes are not affected during downtime or vacations.
Show me how


 and select Apply to all days to set the same active hours for each day of the week.
Tip:
Create multiple SLA policies and apply them to different scenarios. For example, create a "VIP" SLA policy that applies to tickets with a "VIP" label. Learn more about using Automatic Actions to apply labels to tickets.
Managing your SLA policies:
Activate, deactivate, sort, edit, duplicate, or delete SLA policies from your SLA Settings. Learn More
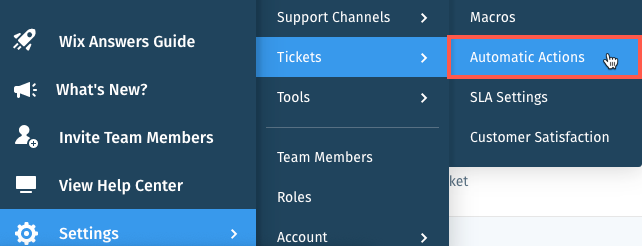
Creating an Automatic Action for Your SLA Policy
Create an Automatic Action to apply a Service Level Agreement (SLA) policy to tickets that meet conditions you define. If you have multiple SLA policies, create Automatic Actions for each.
Show me how
 to apply the action when:

Viewing SLA Policies on Tickets
View SLA indicators directly on tickets to easily understand how much time remains before a goal is missed. Hover over each SLA indicator to view the policy name, target, and respond by date/time.
Show me how
 in the side panel on the left.
 and select a language to show its Views and tickets.
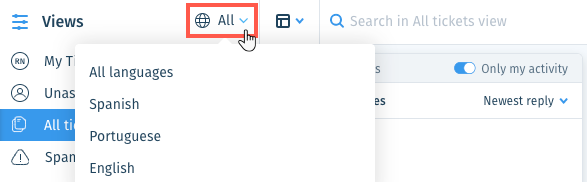


Viewing Tickets by SLA Response and Resolve Times
Display tickets that have met, missed, or are close to missing their SLA policy goals. Add the SLA filter to Views, then save them for all team members to check in on performance goals.
Show me how


Was this article helpful?