
Wix Answers Help Center
Creating a Saved Reply
Saved replies allow team members to easily add prewritten templates to their ticket replies. Address common questions by creating saved replies for personal use or shared replies for you entire team. Add keyboard shortcuts for faster reply times and include dynamic placeholders to automatically insert known details.
Important:
To create saved replies, you must be an administrator or have a custom role with Manage shared saved replies enabled in the Ticket List & Saved Replies permissions.
We recommend using saved replies to:
- Create fun, opening and closing customized replies.
- Quickly respond to common problems by typing # and a reply shortcut.
- Insert dynamic placeholder text and reduce the need to manually customize every detail.
To create a saved reply:
- Hover over the One Inbox icon
 in the side panel and click Saved Replies.
 - Click + Create Reply.
- Select the saved reply Type:
- Shared: The saved reply is available to all team members with relevant permissions.
- Personal: The saved reply is only available to the team member that created it.
- Enter or edit the Name of the saved reply.
- (Optional) Enter a keyboard shortcut for inserting the reply in the Shortcut field.
Note: Team members can type # followed by the Shortcut (e.g. #details) to add the saved reply to a ticket reply.
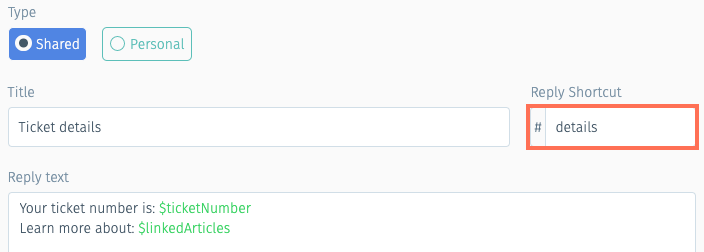
- Click the Reply text field and enter your saved reply content. You can also:
- Click the Add attachment icon
 to attach a file.
 - Click the Add emoji icon
 to add an emoji.
 - Type $ to add dynamic placeholder text.
- Click the Add attachment icon
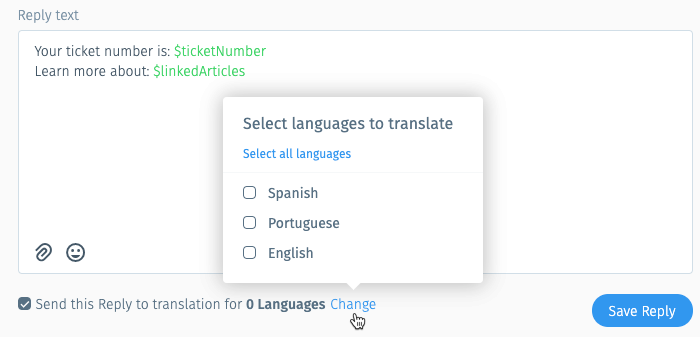
- (Optional) Send a translation task for the saved reply:
- Click the Send this Reply to translation for [#] Languages checkbox.
- Click Change and select the languages you'd like to send translation tasks to.
- Click Save Reply.
Tip:
Learn how to add saved replies to tickets.
Was this article helpful?