
Wix Answers Help Center
Creating and Editing Custom Ticket Views in One Inbox
Views are private or shared sets of conditions that define which tickets appear in the ticket lists and the order in which they appear.
You can create new Views from scratch or duplicate existing Views and edit their settings. When you edit a View, your changes save to your personal profile so you can revisit them later. If you want other team members to have access to your changes, save them to the existing shared View or to a new one. You can create a private View that only you can access, which appears under "My Views" in the View panel.
Ticket metric calculations:
The default "All tickets" View includes all merged tickets (both primary and closed by merge). Deleted, snoozed, and spam tickets are excluded from the View. You can add the Snoozed Tickets filter to include snoozed tickets or edit the Spam filter to include spam tickets. Learn how ticket metrics are calculated differently in other areas of Wix Answers.
Important:
To save custom Views, you must be an administrator or have a custom role with Create, update, and deleted views enabled in the Ticket List & Saved Replies permissions.

Learn more about:
Creating New Views From Scratch
Create a new shared or private View, then add filters that define which tickets appear in the View's ticket lists.
To create a new View from scratch:
- Click the One Inbox icon
 in the side panel on the left.
 - (Optional) Click the Language icon
 and select a language to show its Views and tickets.

- Click + Create View in the Views panel on the left.
- Enter the View name in the field.
- (Optional) Click the Make View private toggle
 to make it a private View that can only be accessed by you.
Note: Once created, you can't change a private View into a shared View and vise versa. - Click Create View.

- Choose what you want to do:
Add or edit filters

 at the top-right of the relevant filter to remove it.
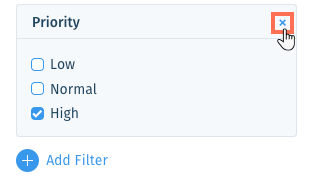
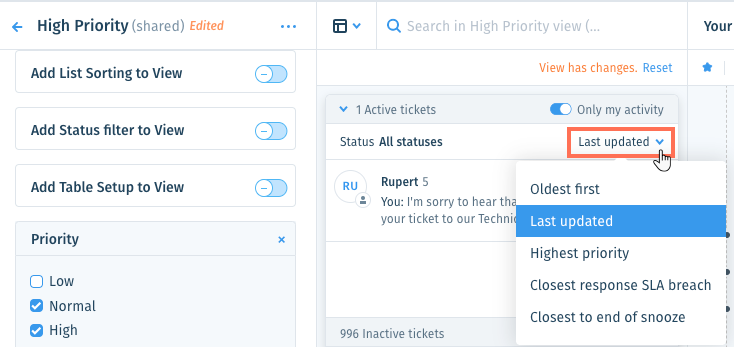
Add list sorting to the View
 before saving.
 at the top-right of the relevant ticket list and select a sorting option:
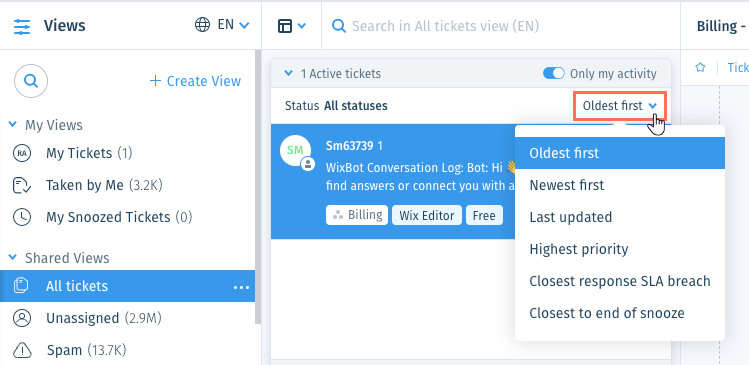
 on the left.
 Add a status filter to the View
 before saving.
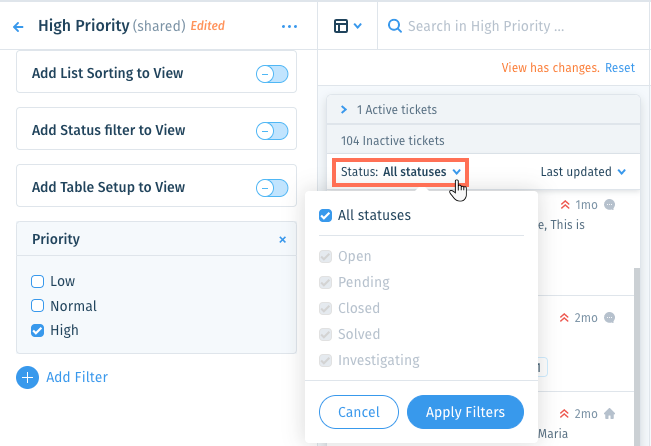
 on the left.
Add the table setup to the View
 before saving.
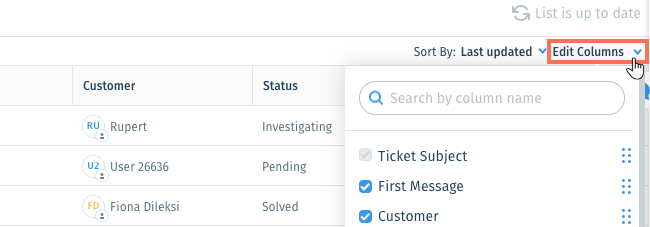
 up or down to reorder the columns.
  on the left.
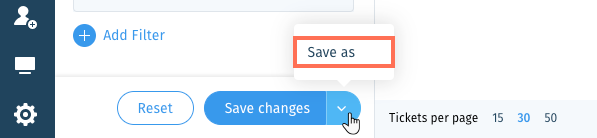
8. Save the View.
Show me how

 to make it a private View that can only be accessed by you.
Tip:
You can click the Show More icon  at the top of the Views panel and select:
at the top of the Views panel and select:- Reset: (If you've edited the View but haven't saved changes) Revert the View to its last saved version.
- Rename: Change the name of the View.
- Delete: Permanently remove the View for all team members.
Duplicating Views to Create New Ones
When you want to create a new View from an existing View's setup, duplicate the View. Then edit the filters that determine which tickets appear in the View's ticket lists. Save the new View if you or other team members will need to use it later.
Note:
You cannot duplicate the My Tickets, Taken by Me, or My Snoozed Tickets Views.
To duplicate and create a new View:
- Click the One Inbox icon in the side panel on the left.
- (Optional) Click the Language icon and select a language to show its Views and tickets.
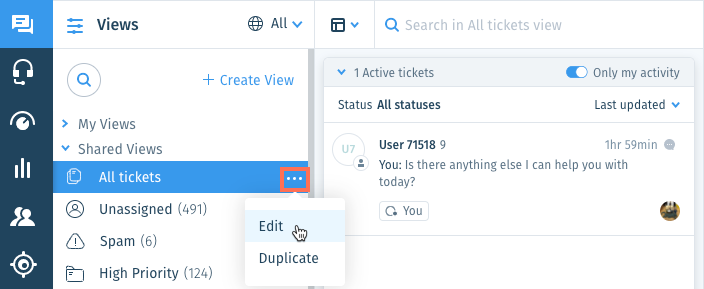
- Select the View you'd like to duplicate from the Views panel on the left.
- Click the Show More icon
 next to the View name and select Duplicate.

- Edit the View name in the field.
- (Optional) Click the Make View private toggle to make it a private View that can only be accessed by you.
Note: Once created, you can't change a private View into a shared View and vise versa. - Click Create View.

- Select the View you just created from the Views panel on the left.
- Choose what you want to do:
Add or edit filters
Add list sorting to the View
Add a status filter to the View
Add the table setup to the View
10. Save the View.
Show me how
Tip:
You can click the Show More icon at the top of the Views panel and select:
at the top of the Views panel and select:- Reset: (If you've edited the View but haven't saved changes) Revert the View to its last saved version.
- Rename: Change the name of the View.
- Delete: Permanently remove the View for all team members.
Editing Existing Views
You can edit an existing View to change the filters, sorting options, and table setup that affects its ticket lists. If you or other team members will need to reuse the changes, save them to the existing View, or save them to a new View.
Note:
In the My Tickets, Taken by Me, and My Snoozed Tickets Views, you can filter the ticket lists by status and sort them, but you cannot add other filters.
To edit an existing View:
- Click the One Inbox icon in the side panel on the left.
- (Optional) Click the Language icon and select a language to show its Views and tickets.
- Select the View you'd like to edit from the Views panel on the left.
- Click the Show More icon next to the View name and select Edit.
- Choose what you want to do:
Add or edit filters
Add list sorting to the View
Add a status filter to the View
Add the table setup to the View
6. Save the View.
Show me how
Tip:
You can click the Show More icon at the top of the Views panel and select:
at the top of the Views panel and select:- Reset: (If you've edited the View but haven't saved changes) Revert the View to its last saved version.
- Rename: Change the name of the View. This option is available for custom Views only, not default Views.
- Delete: Permanently remove the View for all team members. This option is available for custom Views only, not default Views.
Was this article helpful?