
Wix Answers Help Center
Applying Bulk Actions to Tickets
Reduce repetitive work by applying the same action to several tickets at once. Simply select up to 50 tickets, then choose what you want to do to them.
Note:
We're currently working on releasing a new version of the Ticketing System. If the steps below don't match your screen, click here for directions.
To apply actions to multiple tickets:
- Click the One Inbox icon
 in the side panel.
 - (Optional) Click the Language icon
 and select a language to show its Views and tickets.

- (Optional) Select a View on the left.
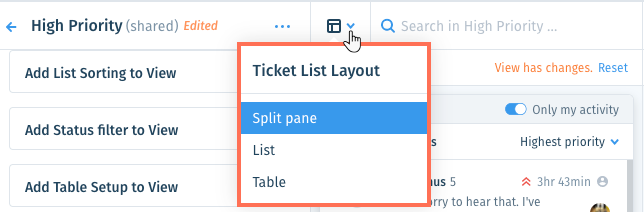
Tip: Add filters to Views to display specific types of tickets in your ticket lists. - (Optional) Click the Layout drop-down next to the Search field and select a ticket list layout (Split Pane, List, or Table).
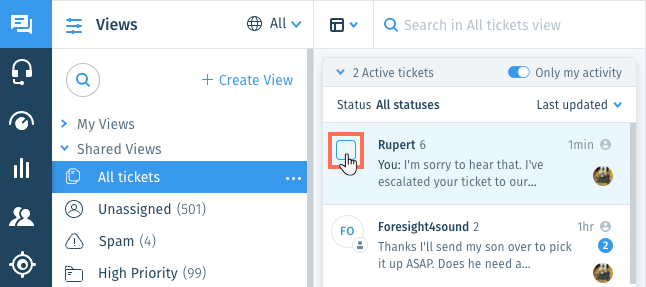
- Hover over the customer image or initials on a ticket you'd like to modify and click the checkbox.
Tip: From the footer of the List or Table layouts, you can click the number next to Tickets per page to adjust the amount of displayed tickets per page.
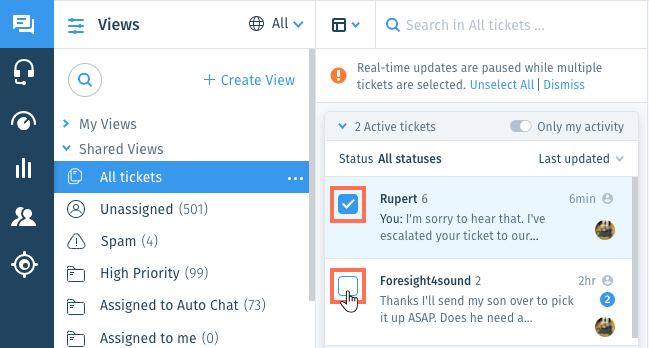
- Click the checkbox on up to 50 tickets to select them.
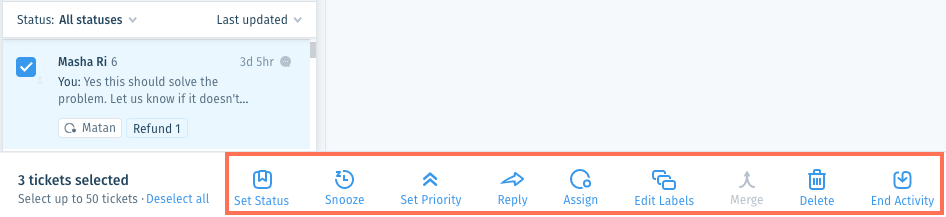
- Select the bulk action you want to apply to the selected tickets from the footer:
- Set Status: Select the status you want to change the tickets to and click Update Status.
- Snooze: Choose how long you want to postpone ticket handling and select the relevant snooze option next to Cancel. Learn more about snoozing tickets.
- Set Priority: Select the priority you want to change the tickets to and click Update Priority.
- Reply: Enter the reply you want to send to the tickets and click Send.
Note: To add an internal note to the tickets, click Internal Note, enter a note and click Add Note. - Assign: Search for the team member or group you want to assign the tickets to and click Assign Tickets.
- Edit Labels: Enter the name of the label you want to add or remove in the relevant field and select the label. Then click Update Labels.
- Merge: Click the Reorder icon
 on the ticket you want the other ticket(s) to merge into and drag the ticket into the No primary ticket selected section. Learn More
 - Delete: Click Yes, Delete to delete the tickets.
Note: Click Block ticket sender to also ban the users from sending or receiving tickets via your support channels. - End Activity: Set the status of the tickets and end their active sessions:
- Choose an option:
- Keep current ticket statuses: End the active ticket sessions and don't change the ticket statuses.
- Set status to: End the active ticket sessions and change the ticket statuses. Select the status the tickets will change to (Open, Pending, Closed, Solved, or Investigating).
- Click Set & End All Sessions.
- Choose an option:
Note:
Selecting multiple tickets in the Split Pane layout pauses real-time updates to your ticket lists.
Was this article helpful?