
Wix Answers Help Center
Setting Up Your Ticketing System
The Wix Answers ticketing system makes it easy to communicate with your customers. You can accept tickets from various support channels, and manage them all in one place.
Step 1 | Set up your channels
Start thinking about which support channels you'd like to use in your ticketing system. You can connect the following channels: help center, call center, widgets, live chat, mailboxes, Facebook, Instagram, WhatsApp, Twitter, and SMS messaging.
Click below to learn how to set up each channel:
Help Center
Note: We're currently working on releasing new help center settings. If the steps below do not match your help center settings, click here for directions.
- In the Wix Answers app, go to Settings > Support Channels > Help Center.
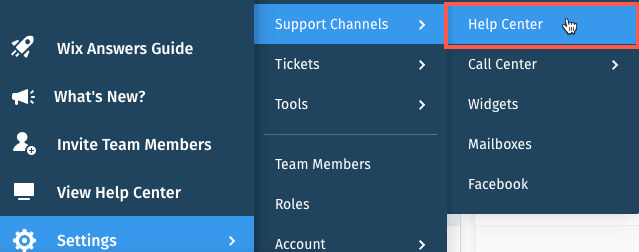
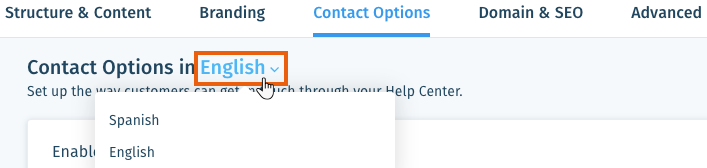
- Click the Contact Options tab at the top.
- Select a language next to Contact Options in.
- Click the Enable ticket submission toggle
 to allow customers to contact you through your Help Center.
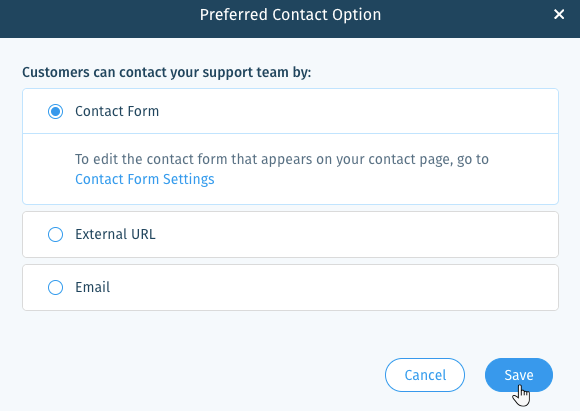
 - Click Edit next to Customers can contact your team by [method] and choose how customers can submit tickets in your Help Center:
- Contact Form: Allow customers to use the form on your Contact Page to contact you.
- External URL: Allow customers to use an external contact form. Enter the URL of the form.
- Email: Allow customers to contact your team by email. Enter the email address tickets will be sent to.
- Click Save.
Tip:
Call Center
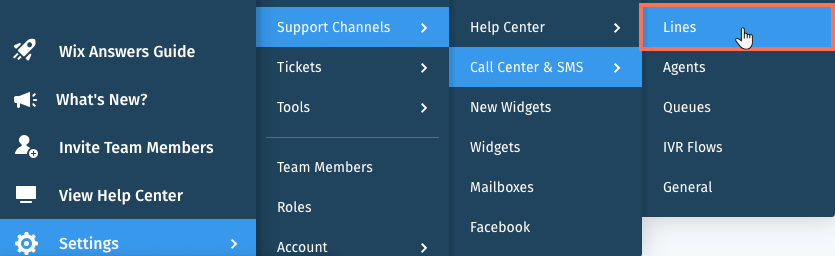
- In the Wix Answers app, go to Settings > Support Channels > Call Center & SMS > Lines.
- Click + Add New Line.
- Enter the Line Name and Line Description used for internal purposes.
Note: If you already have a line, click Make this the default line for outbound calls to make it your default outgoing line. - Click Next.
- Enter the name of the country you want to use for the phone number's country code and select it from the list.

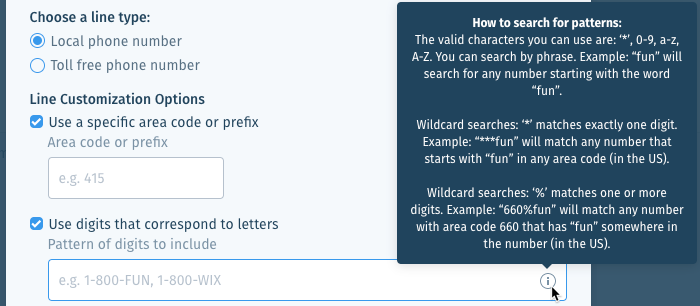
- Choose a line type:
- Local phone number: Use a phone number with a local area code.
- Toll free phone number: Use a phone number with a toll-free area code.
- (Optional) Choose line customization options:
- Use a specific area code or prefix: Enter the area code or prefix you want to use for the phone number.
- Use digits that correspond to letters: Enter a pattern of digits you want to include in the phone number.
For example: Enter "SELL" if you want the number to include "7355" (the dial pad numbers that correspond with "SELL").
- Click Next.
- Select an available number from the list.
Note: If there are no matching phone numbers or you'd like to edit your line preferences, click Back and repeat steps 6-8. - Review the line details and click Create Line when you're ready.
Note: You may need to submit proof of a valid address or identification to purchase some phone numbers. Learn More - Click Manage the New Line to go to the line settings where you'll set up the business hours in the next step.
Widgets
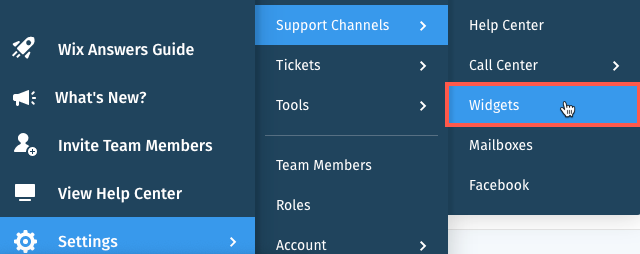
- In the Wix Answers app, go to Settings > Support Channels > Widgets.
- Click Create New Widget.
- Enter a name for your Widget and click Create Widget.
- (For multilingual widgets): Click the language next to Settings for and select a language.

- (Optional) Click the Limit contact accessibility toggle
 to hide your contact options unless a customer marks an article in your Widget as "unhelpful."
- Click the toggle next to the relevant contact options to enable:
- Live Chat: Offer real-time chat support through your Widget. Learn how to set up Live Chat.
- Contact Form: Allow customers to submit tickets through a custom contact form. Learn how to set up a contact form.
- Phone Support: Allow customers to request callbacks from your Call Center agents. Learn how to set up phone support in your Widget.
Live Chat
- In the Wix Answers app, go to Settings > Support Channels > Widgets.

- Click Create New Widget.
- Enter a name for your Widget and click Create Widget.
- (For multilingual widgets): Click the language next to Settings for and select a language.
- (Optional) Click the Limit contact accessibility toggle to hide your contact options unless a customer marks an article in your Widget as "not helpful."
- Click the Live Chat toggle to enable Live Chat in your Widget.
- Click Manage next to Live Chat.

- Customize the Chat Header:
- Enter a title in the Title field.
- Click Display subtitle and enter a subtitle.
- Leave Display agent avatars checked to display agent avatars.
- Leave Display a response time message checked and enter the amount of time it usually takes for an agent to respond.
- Customize the Chat Options:
- Leave Send an automatic greeting message checked and enter a message that will greet customers that begin chatting.
- Leave Ask for customer's email before chat checked to require that customers enter their email address to begin chatting.
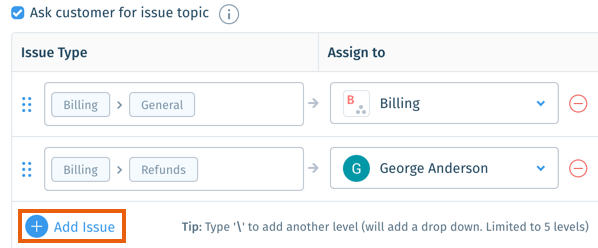
- Click Ask customer for issue topic to prompt customers to choose a topic, which assigns their chat to a specific agent or group. Learn More
- Click + Add Issue.
- Enter an issue topic in the Issue Type field and press Enter.
- (Optional) Click the Issue Type field and enter another issue topic to add a sub-level topic that displays as a drop-down menu.
- Click the Assign to drop-down and select an agent or group to assign the chat.
- Click + Add Issue and repeat the steps to add more issue topics.
- Click Add custom fields to the Live Chat form to add custom fields:
- Click + Add Field.
- Select the fields you'd like to add and click Add Selected Fields.
Note: Click Manage Custom fields to add a field that is not displayed. - Click the Mandatory toggle to require customers to fill out the field.
- Set your Live Chat Availability business hours:
- Click Edit next to Live Chat Availability.

- Set your available chat hours:
- Available 24/7: Click to keep live chat open at all hours.
- Custom Hours of Operation: Click to set custom business hours:
- Click the toggle next to each day to turn chat on or off.
- Click the times to adjust your opening and closing hours.
- Click the Show More icon
 to the right of a day and select:
- Apply to all days to set the same business hours for each day of the week.
- Add another period to (selected day) to add another block of time.

- Click the toggle
- (Optional) Allow customers to send chats outside of business hours:
Note: When an agent replies, your customer receives the message in Live Chat (if they reopen the widget) and email.- Click Let customers contact you in chat outside of business hours.
- Click the Welcome message field and enter the message customers see when they start a new chat.

- (Optional) Apply your Live Chat's business hours to all other contact options in your Widget:
- Click Apply business hours to all contact options.
- Click Yes, Apply to All.
- Click Save.
- Click Edit next to Live Chat Availability.
- Scroll up and click Save next to Live Chat Settings.

Next learn how to:
Email
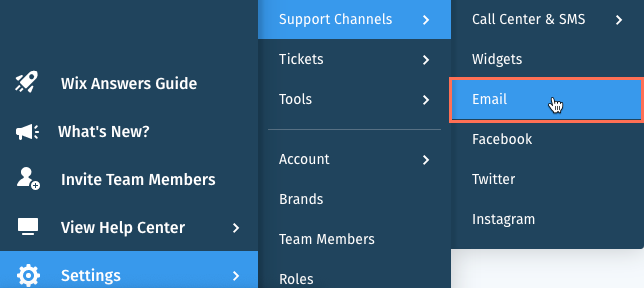
- In the Wix Answers app, go to Settings > Support Channels > Email.
- Click + Add Mailbox.
- Enter a name for your new mailbox.
- Click Next.
- (Optional) Set up mailbox forwarding:
- Enter the email address you'd like to forward to your Wix Answers mailbox.
- Go to your email provider and set up email forwarding to your Wix Answers mailbox.
Tip: Learn how to set up email forwarding from the following email providers:
- Click Save.
Tip: Connect an outgoing email domain to send emails professionally from your own personal domain.
Learn more about setting up email as a support channel.
Learn more about setting up email as a support channel.
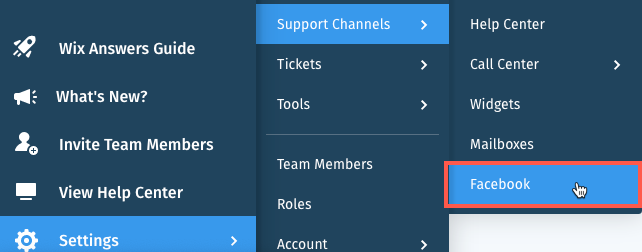
Facebook
- In the Wix Answers app, go to Settings > Support Channels > Facebook.
- Click Connect Facebook Account.
- Log in to your Facebook account.
- Select the checkbox next to the Facebook Pages you want to connect.
- Click Connect.
- Click the toggle
 to open a ticket when a user writes:
- A wall post.
- A private message.
Twitter
Important: Connecting Twitter as a support channel is not yet available in all Wix Answers accounts. Contact us if you would like to add this feature.
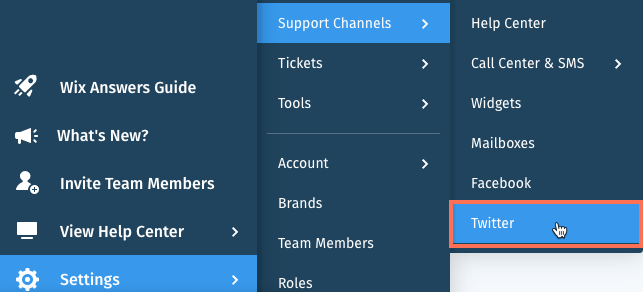
To connect Twitter to your Wix Answers account:
- In the Wix Answers app, go to Settings > Support Channels > Twitter.
- Click Add Twitter Account.
- Sign in to your Twitter account.
- Click the toggle
 next to each option you want to enable:

- Sends a direct message: Create a new ticket whenever a Twitter user sends a direct message to your Twitter account.
Note: Make sure your Twitter account settings allow message requests from everyone. Learn how on Twitter - Mentions this username: Create a new ticket whenever someone posts or replies to a tweet and mentions your Twitter account's username (e.g. @wixanswers).
Note: If your account is mentioned twice in the same thread, only the first mention creates a ticket.
- Sends a direct message: Create a new ticket whenever a Twitter user sends a direct message to your Twitter account.
- (Optional) Click + Add Twitter Account to connect another Twitter account.
Learn how to reply to Twitter messages from One Inbox.
Instagram
To connect Instagram to your Wix Answers account:
- In the Wix Answers app, go to Settings > Support Channels > Instagram.

- Click Add Instagram Account.
- Log in to the Facebook account that is linked to your Instagram Business Account.
- Select the Instagram Business Account(s) you want to connect and click Next.
- (Optional) Click the toggle next to each option you want to enable.
- Click Done.
- Click OK.
- Make sure the Sends a direct message toggle is enabled next to the relevant Instagram account.
Learn how to reply to Instagram messages from One Inbox.
WhatsApp
- Click here to go to our onboarding request form.
- Enter your Contact information (First name, Last name, Work email, Phone number).
- Enter your Account details:
- WhatsApp Business display name: View the WhatsApp display name guidelines.
- Facebook Business Manger ID: Learn how to find your business ID.
- Business address: Enter the location of your business.
- Short description of your business: Enter a short description of your business.
- Company logo: Click Choose file, then select a file from your computer and click Open.
Note: Your logo must be a jpg or png image file with a minimum size of 640 x 640 px. The logo must be centered and cannot have a transparent background.
- Enter your Company details:
- Primary business HQ: Enter the location of your primary business headquarters.
- Company vertical: Click the drop-down and select your industry.
- Number of employees: Click the drop-down and select the number of employees in your business.
- Review the terms and conditions, then click I read and agree.
- Click Submit.
After submitting your request it may take a few days for WhatsApp to approve and us to set up the integration. We'll let you know once it's ready to use in your account.
Learn more about connecting WhatsApp as a support channel.
SMS Messaging
- In the Wix Answers app, go to Settings > Support Channels > Call Center & SMS > Lines.

- Select the line you want to add SMS to.
- Scroll to the SMS section and choose what you want to do:
- Activate incoming SMS messages: Allow customers to send SMS text messages to line's phone number to create tickets.
- Activate outgoing SMS messages: Allow team members to send SMS messages to customers from the line's phone number.
Learn more about adding SMS messaging to your call center lines.
Step 2 | Create saved replies
Save time when answering tickets, by enabling agents to re-use common responses. This is great for openers (e.g. "Thank you for contacting us") or closers (e.g. "If you need any further assistance, feel free to contact us again"), or any other text that you find yourself writing over and over again.
Show me how
- Hover over the One Inbox icon
 in the side panel and click Saved Replies.
 - Click + Create Reply.
- Select the saved reply Type:
- Shared: The saved reply is available to all team members with relevant permissions.
- Personal: The saved reply is only available to the team member that created it.
- Enter or edit the Name of the saved reply.
- (Optional) Enter a keyboard shortcut for inserting the reply in the Shortcut field.
Note: Team members can type # followed by the Shortcut (e.g. #details) to add the saved reply to a ticket reply.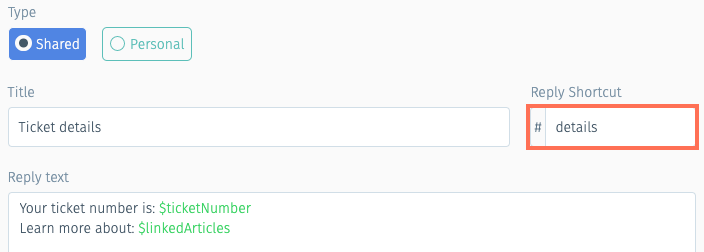
- Click the Reply text field and enter your saved reply content. You can also:
- Click the Add attachment icon
 to attach a file.
 - Click the Add emoji icon
 to add an emoji.
 - Type $ to add dynamic placeholder text.
- Click the Add attachment icon
- (Optional) Send a translation task for the saved reply:
- Click the Send this Reply to translation for [#] Languages checkbox.
- Click Change and select the languages you'd like to send translation tasks to.
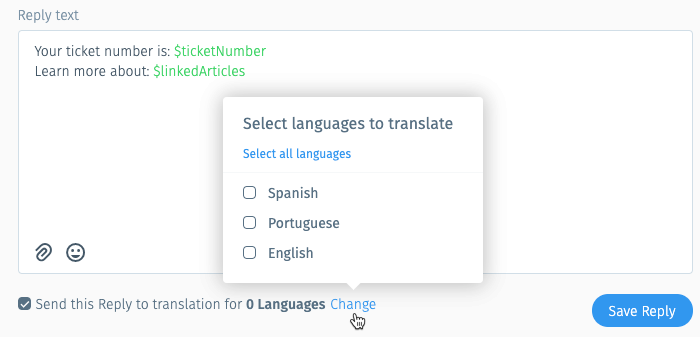
- Click Save Reply.
Step 3 | Create team member groups
Create team member groups consisting of agents with similar skillsets. Assign tickets to groups so that more than one agent can potentially solve the issue.
Show me how
- Hover over Settings
 in the side panel and click Team Members.
 - Click Create New Group on the left.
- Enter a name for the group and click Create.
- Click + Add Members to Group on the right.
Note: New team members must accept an invitation to Wix Answers before you can add them to a group. Learn how to invite team members. - Start typing the team member's name and select them from the list.
- Repeat steps 4 - 6 to add additional team members to your group.
Learn how to assign tickets to groups.
Take a look at the video below for step-by-step directions regarding setting up your mailbox, connecting your Facebook account and adding team members.
Was this article helpful?
Yes
No