
Wix Answers Help Center
Transferring Your Call to a Queue
Transfer your call when you need to get it to another queue or talk with an agent from another queue. While transferring, you can choose to stay on the call to speak with the other agent (known as a warm transfer), or leave the call (known as a cold transfer).
Tips:
- Create specialized queues for agents to transfer to when they need help. For example, you could have a "De-Escalations" queue with supervisors assigned to it, and a "Troubleshooting" queue with technically-skilled agents. Learn how to set up additional queues.
- If you need help from a specific agent, instead of transferring to a queue, you can add the agent to your call.
Learn more about:
Choosing "Transfer & Stay" (Warm Transfer)
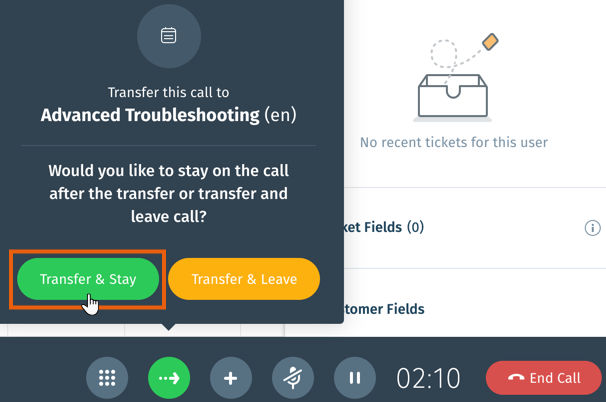
The "Transfer & Stay" option generally provides the best transfer experience for your callers and agents. When selected, you have a chance to speak with an agent from the other queue while the caller is on hold. You can get advice and then return to the caller, or give the other agent important details and let them take over.
Note:
To use the Transfer & Stay option, an agent must be available and assigned to the queue you wish to transfer to.
To transfer and stay on your call:
- While on a call, click the Transfer Call to Queue button
 at the bottom of your screen.

- Select the relevant queue with a green circle next to its name.

Note:
- A green circle next to the queue name indicates that at least 1 agent is available in the queue.
- A red circle indicates that all agents in the queue are busy and you cannot warm transfer to it.
- A grey circle indicates that no agents are assigned to the queue.
- Click Transfer & Stay to connect with an agent from the queue and place the caller on hold.
- Decide whether you or the other agent will continue the call:
You continue the call
 to take the caller off hold and continue helping them.
The other agent takes over the call
 to take the caller off hold.
 Tip:
Remember to add your call notes so that team members can later understand what the call was about.
Choosing "Transfer & Leave" (Cold Transfer)
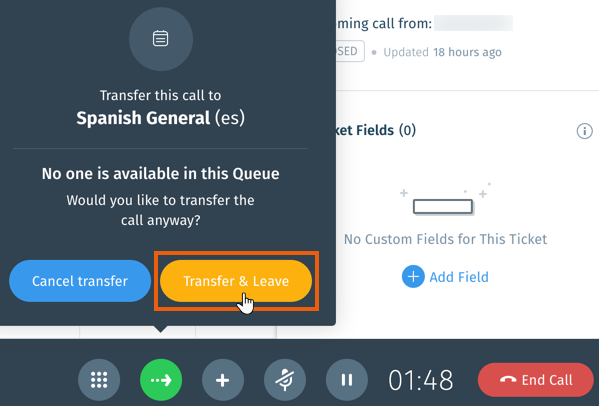
Choose "Transfer & Leave" to cold transfer your call to a queue that has no available agents assigned to it. When selected, the call is immediately placed in the queue's waiting list, and you leave the call. Your status changes to "Wrap-Up," and the call waits in the queue until an agent is available.
Tips:
- To provide the best experience for your caller, be sure to set their expectations when cold transferring. Let your caller know you'll be transferring them and that they'll be on hold until an agent in the queue is available.
- Use the Set a custom priority for transferred calls Spotter Scenario to raise or lower the priority score of a call when an agent cold transfers it. Learn more about priority scores.
To transfer and leave your call:
- While on a call, click the Transfer Call to Queue button at the bottom of your screen.
- Select the queue you wish to transfer the call to.

Note:
Queues display a red circle next to their name when they don't have any available agents. A green circle displays when there's at least 1 agent available in the queue. A grey circle shows when no agents are assigned to the queue.
- Click Transfer & Leave to leave the call and place it in the queue's waiting list.
Tip:
Remember to add your call notes so that team members can later understand what the call was about.
Was this article helpful?